Add b-roll and image overlays
Drop your own images and video clips over your footage, then move, resize, rotate and time them on the timeline.
Add an image or clip
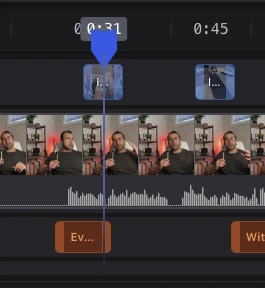
- Drag an image or video file from Finder onto the timeline. A b-roll row appears above your footage while you drag.
- Drop images anywhere on the timeline. Drop videos on the b-roll row; a video dropped on the footage row is added as a new block instead.
- It starts where you drop it, in the middle of the frame and about two thirds of its width. Images stay up for 5 seconds, and videos play for their full length without sound.
- Images: PNG, JPG, GIF, WebP, HEIC, AVIF, TIFF and BMP.
- Videos: MP4, MOV, M4V, WebM, AVI and MKV.
CueClip copies the file into your project, so the overlay keeps working if you move or delete the original.
Place it on screen
Click the overlay in the preview to select it.
- Move: drag it anywhere in the frame.
- Resize: drag a corner, from a small picture-in-picture up to filling the frame. Hold Option to resize from the centre.
- Rotate: drag just outside a corner. Hold Shift to snap the angle.
Time it on the timeline
- Drag the clip along the b-roll row to change when it appears. It snaps to the edges of your blocks.
- Drag either edge to make it shorter or longer. For a video, this trims which part of the clip plays.
- Select it and press ⌘B to split it at the playhead, or press Delete to remove it.
- Drag a b-roll video down onto the footage row to turn it into a normal block, with its own sound and transcript.
Questions
Does b-roll show up in the export?
Yes. It's rendered into the exported video exactly where you placed it.
Can an AI assistant add b-roll for me?
Yes. Connect CueClip to Claude or ChatGPT and give it your files; it reads the transcript and places each one where you talk about it. See Use CueClip with Claude and ChatGPT (MCP).